Knitting ideas - also suitable for beginners
Share
As a beginner in knitting, you face many challenges. What basic techniques should I master before I dare to tackle a large piece of knitting? What equipment do I need? With our simple instructions you can quickly answer these questions.
The next big step is the selection of a suitable project. Whether you're starting your first project or already have some experience, you're sure to find the right instructions at us - whether it's a hat, socks or a scarf.
Knitting ideas

In knitting for beginners, ideas and suggestions are often in demand. If you don't have that much experience with the various techniques, simpler projects such as a headband or a scarf are suitable at the beginning. If you are running out of ideas when knitting, here you will find a compilation of knitting projects that are suitable for both beginners and advanced users.
A little tip:
We advise you to learn and practice the basics of knitting first. Don't plan on a specific project for this yet. Simply cast on, knit a few rows in your chosen technique and bind off.
Once the basics are in place, start with your first project. Use a thicker yarn and a thick needle for this. This will finish the knitting quicker and give you better control over the thread.
Knit scarf

A scarf is a perfect accessory for colder days. The scarf can be knitted in a variety of patterns and colors. gradient yarns are particularly beautiful here. As a beginner, you knit the scarf in a simple basic pattern.
Here we present the large seed stitch. It consists only of right and left stitches, but still looks special and more complex.
- 1-2 row: alternately knit two stitches, purl two stitches.
- 3-4 rows: alternately purl two stitches, knit two stitches.
You always work two consecutive rows in the same way and then knit in reverse. The right and left stitches always appear offset to the two previous rows.
This is how you knit a scarf in a large moss stitch step by step:
- Cast on 34 stitches
- Begin the row with an edge stitch
- Knit 32 stitches in basic pattern
- End the row with an edge stitch
- The sequence is repeated as described above
- Knit to desired length of scarf
- Cast off all stitches loosely
Knit a triangle scarf

Triangle scarves are great for individual works. These shawls are often knitted from the top to the width. Therefore, depending on personal preference, they can be knitted with more or less wool or in different thread sizes. In this way, individual mesh sizes and cloth widths can be created. The color or pattern can also be varied as desired.
We would like to introduce you to a garter stitch shawl with yarn overs. For orientation: We used a 3-thread bobble and needle size 4 here.
- Cast on 7 stitches
- 1. Row: Knit all 7 stitches
- 2. Row: Knit 1, 4x(knit 1, 1 yarn over), knit 2 (= 11 stitches)
- 3. Row: Knit all stitches including yarn overs
- 4.Row: After the first two knit stitches, before and after the middle stitch and before the last two knit stitches, make a yarn over (= 15 stitches)
- Row 5: Knit all stitches including yarn overs
- Middle section: Knit the 4th and 5th rows alternately
- End: Cast off the stitches when the end of your bobble is reached
- Sew the protruding threads with a wool needle
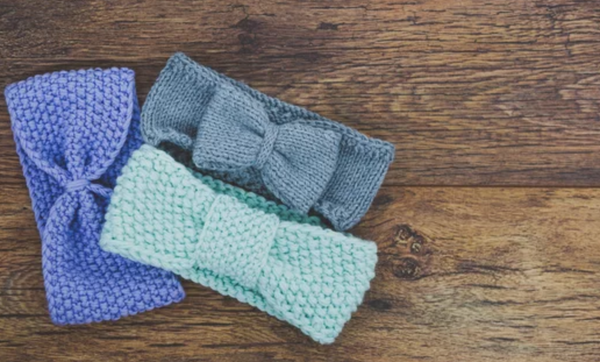
Knit headband

In the transitional period, it doesn't always have to be a hat. A headband often protects the ears from cold wind. To add a personal touch to your headband, you can knit a twist into almost any pattern. To know where to knit in the twist, use the circumference of your head as a guide:
Place the piece of knitting in the middle of the back of the head. When it's halfway to your head, you can start the twist.
- Put half of your stitches on a dummy needle or another knitting needle
- Put the left needle over the right one so that the right needle is under the left needle to the left
- Keep the remaining stitches as normal
- Now knit the stitches on the auxiliary needle
This is how the twist comes about. Don't worry, the knitted piece looks a bit unusual at first. Don't let that scare you, it's completely normal. After a few rows you can clearly see the twist. When you have knitted the other half of your head circumference, use a darning needle to sew the yarn that you cut off and your twisted headband is complete.

If you are satisfied with your first work, you can look for new challenges in our instructions. Here you will find some instructions to knit a scarf or a hat, for example. Just try it out! For more variety, you can of course also try out the most diverse patterns on small practice pieces and look for your favorite pattern for a project. If these small projects go well, nothing stands in the way of larger projects!
.


