







Knitting arm warmers: an introduction
When you knit arm warmers, you enter a wonderful world of craftsmanship and creativity. Arm warmers are not only practical but also stylish accessories that can lift any outfit. In this introduction, we will take a closer look at knitting arm warmers and the basic knitting techniques involved.
Why knit arm warmers?
There are several reasons why knitting arm warmers is a rewarding activity. Here are some of the benefits of knitting arm warmers:
-
Versatility: Arm warmers are extremely versatile and can be knitted in a variety of lengths, patterns and colours. You can design your arm warmers entirely to suit your personal style and preferences.
-
Quick projects: Compared with larger knitting projects such as jumpers or scarves, arm warmers are finished relatively quickly. They are a great project for improving your knitting skills while making something useful.
-
Practical use: Arm warmers keep your wrists and forearms warm while still giving you the freedom to move your fingers unhindered. They are ideal for outdoor activities where you need extra warmth but still want to keep your dexterity.
Basic knitting techniques for arm warmers
Before you start knitting arm warmers, it is important to master the basic knitting techniques. Here are some techniques you will need for knitting arm warmers:
-
Casting on stitches: To start your arm warmers, you need to cast on stitches. This can be done either by picking up stitches along an edge or by picking up stitches from the stitch.
-
Knitting in the round: Arm warmers are usually knitted in the round to allow for seamless construction. For this you need either circular needles or a set of double-pointed needles, depending on your preferred method.
-
Types of stitch: Various types of stitch are used when knitting arm warmers, such as the knit stitch, the purl stitch and knitting in rounds. It is important to master these stitches to create the patterns and textures you want in your arm warmers.
-
Casting off stitches: At the end of your knitting project, you need to cast off your stitches to stabilise the edge. There are various methods of casting off, such as the simple cast-off and the elastic cast-off.
Once you have mastered these basic knitting techniques, you are ready to dive into the ultimate guide to perfectly knitted arm warmers and create your own unique designs.
The ultimate guide to perfectly knitted arm warmers
When it comes to making perfectly knitted arm warmers, detailed instructions are crucial. This section provides the materials and tools you need as well as step-by-step instructions to help you create beautiful arm warmers.
Materials and tools
Before you start knitting your arm warmers, it is important to have the right materials and tools to hand. Here is a list of the basic things you will need:
| Materials | Tools |
|---|---|
| Wool | Knitting needles |
| Needle size as specified in the pattern | Tape measure |
| Wool needle | Scissors |
| Stitch markers (optional) |
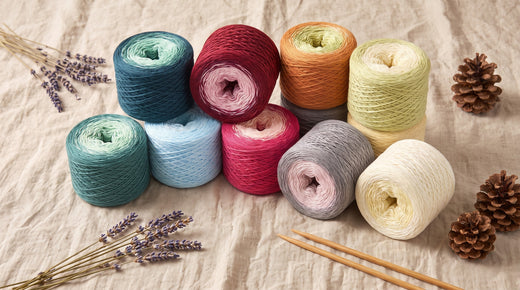
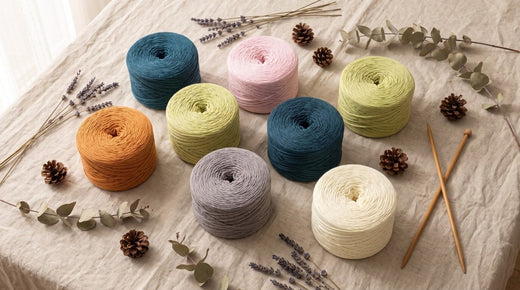
The choice of wool depends on your personal preferences and the look you want for your arm warmers. Bear in mind that different types and weights of wool can lead to different results. Check the pattern for wool recommendations.
Step-by-step instructions
Once you have your materials and tools ready, you can begin the step-by-step instructions. Here is a general guide to help you make perfectly knitted arm warmers:
- Step: Cast-on
- Follow the pattern to put the required number of stitches onto your knitting needles.
- If necessary, use stitch markers to mark the beginning or end of the round.
- Step: Pattern
- Follow the instructions for the knitting pattern you want.
- Repeat the pattern as directed in the pattern until the arm warmers reach the desired length.
- Step: Casting off
- Follow the pattern to cast off the stitches and finish your work.
- Step: Weaving in the ends
- Use a wool needle to weave in the loose threads securely and hide them.
Please note that these are general step-by-step instructions and may vary depending on the specific pattern and knitting pattern. Read the pattern carefully and follow the steps given to achieve the best possible result.
With this ultimate guide and the right materials and tools, you are perfectly equipped to make perfectly knitted arm warmers. Put your knitting skills to work and enjoy the pleasure of wearing your own hand-made arm warmers or giving them as gifts.
The importance of the knitting chart
When it comes to knitting arm warmers, the knitting chart plays an important role. It is used to show the various steps and patterns visually and to provide clear instructions. In this section, we will explain how to understand and read the knitting chart and present an example of a knitting chart for arm warmers.
Understanding and reading the knitting chart
The knitting chart is a graphic representation of the knitting pattern that allows you to take in the individual steps and patterns at a glance. It consists of columns and rows, each assigned to specific knitting techniques or patterns. Each square in the chart represents a stitch or a particular action.
When reading the knitting chart, it is important to understand the symbols and abbreviations used in it. These can vary depending on the pattern and the designer. It is advisable to familiarise yourself with the common knitting abbreviations so that you can interpret the chart better.
Some commonly used symbols in knitting charts are:
- O: knit stitch
- X: purl stitch
- /: yarn over
- -: decrease
- +: increase
By reading and understanding the symbols and abbreviations in the knitting chart, you can work through the pattern step by step and knit the arm warmers you want.
Example of a knitting chart for arm warmers
Here is an example of a knitting chart for arm warmers to illustrate the concept:
| Row | Stitch 1 | Stitch 2 | Stitch 3 | Stitch 4 | Stitch 5 | Stitch 6 |
|---|---|---|---|---|---|---|
| 1 | O | O | O | O | O | O |
| 2 | O | / | O | / | O | / |
| 3 | O | X | O | X | O | X |
| 4 | O | O | / | / | O | O |
| 5 | O | X | X | X | O | X |
In this example, the table shows the first five rows of the arm warmer pattern. The symbols represent the various knitting techniques, such as knit stitches, purl stitches and yarn overs. By reading the table, you can see the stitch sequence and knit the arm warmers accordingly.
The knitting chart is a useful tool when knitting arm warmers, as it helps to visualise the pattern clearly and neatly. By interpreting the symbols and abbreviations correctly, you can use the knitting chart effectively and knit successful arm warmers.
Adjustments and variations
When it comes to knitting arm warmers, it is important that they fit perfectly and suit your individual style. In this section, we will look at adjusting the arm warmers to different sizes as well as design options and patterns.
Adjusting the size of the arm warmers
Everyone has different-sized hands and wrists, so it is important to adjust the arm warmers accordingly to ensure a comfortable fit. Here are some tips for adjusting the arm warmers to different sizes:
- Measure the circumference of your wrist and the palm of your hand to determine the right size.
- Adjust the number of stitches in the round to achieve the size you want.
- Take the stretchiness of the yarn you are using into account and adjust the number of stitches accordingly.
It can be helpful to create a table to record the adjustments for different sizes. Here is an example of what such a table could look like:
| Size | Number of stitches for the ribbing | Number of stitches for the main part |
|---|---|---|
| Small | 40 | 48 |
| Medium | 44 | 52 |
| Large | 48 | 56 |
Design options and patterns
The beauty of knitting arm warmers is the variety of design options and patterns you can try out. Here are some ideas for how you can give your arm warmers an individual touch:
- Use different colours and colour combinations to achieve interesting effects.
- Experiment with different knitting patterns such as cable patterns, lace patterns or rib patterns to give your arm warmers a special touch.
- Add embellishments such as buttons, beads or embroidery to personalise your arm warmers.
The possibilities are endless, and it is a great way to express your creativity through knitting. Do not forget to record your ideas and patterns in a knitting chart so that you can refer to them in future projects.
With these adjustments and variations, you can make sure that your knitted arm warmers fit you perfectly and reflect your personal style. Let your creativity run free and enjoy knitting your unique arm warmers.
Tips and tricks for successful arm warmer knitting
When knitting arm warmers, there are a few tips and tricks that can help you achieve a successful result. Here are two important aspects to bear in mind: avoiding mistakes and troubleshooting, and caring for and storing your knitted arm warmers.
Avoiding mistakes and troubleshooting
Mistakes can occasionally occur when knitting arm warmers. Here are some common problems and tips on how to avoid or fix them:
-
Holes or gaps: To avoid holes between the needles, make sure you tighten the stitches evenly. If necessary, use a smaller needle size to achieve a more even knitted fabric.
-
Twisted stitches: Make sure you do not twist the stitches when casting on. Check your knitting regularly to make sure all the stitches are facing the right way.
-
Tangled threads: Avoid tangling the yarn by untangling and checking it regularly. Keep your knitting area tidy to avoid unwanted tangles.
-
Uneven tension: To ensure even tension, make sure you do not pull the thread too tight or too loose. Keep your hands in an even, relaxed position while knitting.
Caring for and storing knitted arm warmers
For your knitted arm warmers to last a long time and look good, proper care and storage are important. Here are some tips:
-
Washing instructions: Check the washing instructions for the yarn you used to make sure you clean the arm warmers correctly. Hand washing is often the gentlest method, but some yarns may also be machine washable. Use a mild detergent and dry the arm warmers flat.
-
Storage: Store your knitted arm warmers in a clean, dry place to avoid dirt and moisture. It is best to use a fabric bag or a box to protect them from dust.
-
Avoiding creases: To avoid unsightly creases, lay your knitted arm warmers flat or roll them up carefully. Avoid leaving them folded up for a long period of time.
With these tips and tricks, you are well equipped to knit arm warmers successfully. Keep mistake avoidance and troubleshooting in mind while you knit, and make sure you give your knitted arm warmers the right care and storage so that you can enjoy them for a long time.
You can find more articles on this topic here:
https://chiemseegarn.com/blogs/stricken/handschuh-stulpen-stricken
https://chiemseegarn.com/blogs/stricken/ajour-stulpen-stricken
https://chiemseegarn.com/blogs/stricken/handgelenk-stulpen-stricken
https://chiemseegarn.com/blogs/stricken/stulpen-stricken-mit-2-nadeln
https://chiemseegarn.com/blogs/stricken/stulpen-mit-zopfmuster-stricken
https://chiemseegarn.com/blogs/stricken/stulpen-mit-daumenloch-stricken-anleitung
https://chiemseegarn.com/blogs/stricken/stulpen-mit-daumenloch-stricken
https://chiemseegarn.com/blogs/stricken/stulpen-fuer-arme-stricken
https://chiemseegarn.com/blogs/stricken/japanische-stulpen-stricken
https://chiemseegarn.com/blogs/stricken/stulpen-beine-stricken
https://chiemseegarn.com/blogs/stricken/stulpen-stricken-muster
Knitting arm warmers with a thumb gusset
https://chiemseegarn.com/blogs/stricken/stulpen-stricken-anfaenger
https://chiemseegarn.com/blogs/stricken/stulpen-muster-stricken
https://chiemseegarn.com/blogs/stricken/ballett-stulpen-stricken
https://chiemseegarn.com/blogs/stricken/baby-stulpen-stricken
https://chiemseegarn.com/blogs/stricken/stulpen-handschuhe-stricken
https://chiemseegarn.com/blogs/stricken/muster-fuer-stulpen-stricken
https://chiemseegarn.com/blogs/stricken/ballett-stulpen-kinder-stricken
https://chiemseegarn.com/blogs/stricken/stulpen-stricken-einfach
https://chiemseegarn.com/blogs/stricken/stulpen-stricken
https://chiemseegarn.com/blogs/stricken/stulpen-stricken-anleitung-kostenlos
https://chiemseegarn.com/blogs/stricken/stulpen-baby-stricken
https://chiemseegarn.com/blogs/stricken/stulpen-damen-stricken
https://chiemseegarn.com/blogs/stricken/stulpen-mit-daumen-stricken
https://chiemseegarn.com/blogs/stricken/stulpen-stricken-mit-daumen
https://chiemseegarn.com/blogs/stricken/stulpen-stricken-anleitung
https://chiemseegarn.com/blogs/stricken/stulpen-stricken-kinder
https://chiemseegarn.com/blogs/stricken/stulpen-kinder-stricken-anleitung
https://chiemseegarn.com/blogs/stricken/stulpen-stricken-tabelle
You might also be interested in:
- Knitting arm warmers with a thumb gusset
- Knitting a headband for children – size chart
- Knitting lace patterns – free pattern
Matching projects & yarns
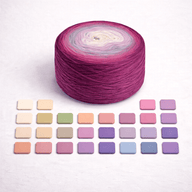
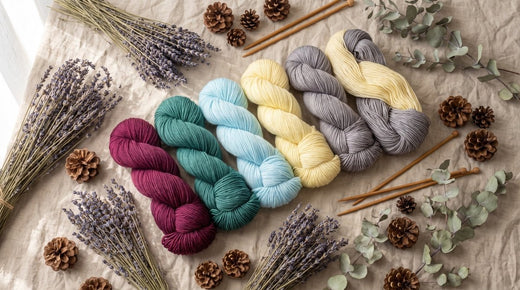
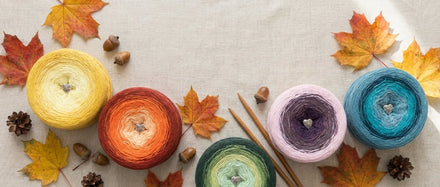
More arm warmer patterns: Arm warmers with a thumb gusset and children's arm warmers. Complete your set with a beanie hat or a cowl scarf. Sock yarn (hard-wearing!) or gradient yarn is well suited to arm warmers.
